Single Sign-On
Enforcing SSO
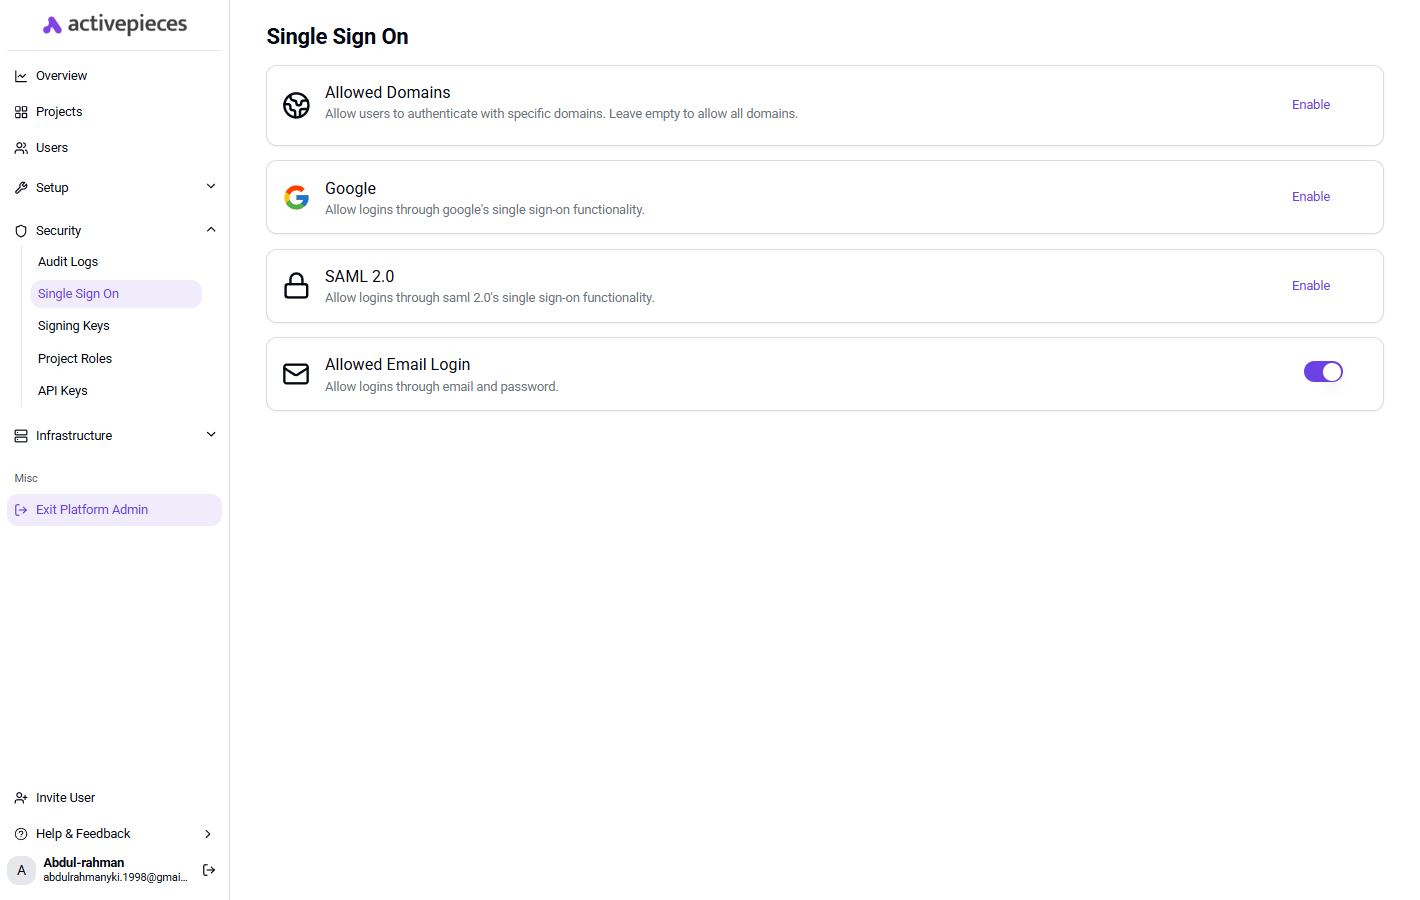
You can enforce SSO by specifying the domain. As part of the SSO configuration, you have the option to disable email and user login. This ensures that all authentication is routed through the designated SSO provider.
Supported SSO Providers
You can enable various SSO providers, including Google and GitHub, to integrate with your system by configuring SSO.
Google:
Step 1: Go to the Developer Console
Step 2: Create an OAuth2 App
Step 3: Copy the Redirect URL from the Configure Screen into the Google App
Step 4: Fill in the Client ID & Client Secret in Staqr
Step 5: Click Finish
GitHub:
Step 6: Go to the GitHub Developer Settings
Step 7: Create a new OAuth App
Step 8: Fill in the App details and click Register a new application
Step 9: Use the following Redirect URL from the Configure Screen
Step 10: Fill in the Homepage URL with the URL of your application
Step 11: Click Register application
Step 12: Copy the Client ID and Client Secret and fill them in Staqr
Step 13: Click Finish
SAML with OKTA:
Step 14: Go to the Okta Admin Portal and create a new app
Step 15: Select SAML 2.0 as the Sign-on method
Step 16: Fill in the App details and click Next
Step 17: Use the following Single Sign-On URL from the Configure Screen
Step 18: Fill in Audience URI (SP Entity ID) with 'Staqr'
Step 19: Add the following attributes (firstName, lastName, email)
Step 20: Click Next and Finish
Step 21: Go to the Sign On tab and click on View Setup Instructions
Step 22: Copy the Identity Provider metadata and paste it in the Idp Metadata field
Step 23: Copy the Signing Certificate and paste it in the Signing Key field
Step 24: Click Save
SAML with JumpCloud:
Step 25: Go to the JumpCloud Admin Portal and create a new app
Step 26: Create SAML App
Step 27: Copy the ACS URL from Staqr and paste it in the ACS urls
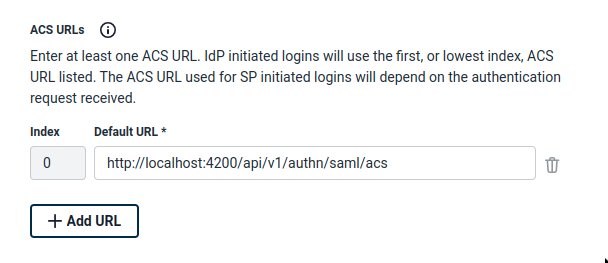
Step 28: Fill in Audience URI (SP Entity ID) with 'Staqr'
Step 29: Add the following attributes (firstName, lastName, email)
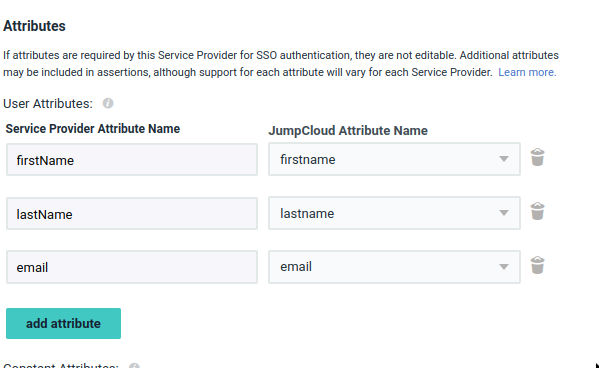
Step 30: Include the HTTP-Redirect binding and export the metadata
JumpCloud does not provide the HTTP-Redirect binding by default. You need to tick this box.

Make sure you press Save and then Refresh the Page and Click on Export Metadata
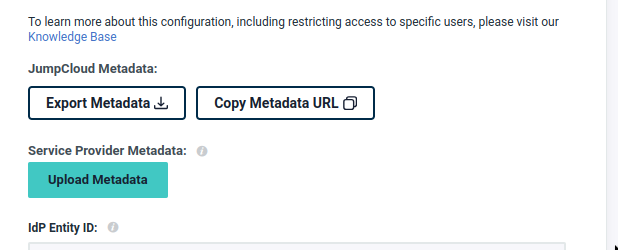
Please Verify Binding="urn:oasis:names:tc:SAML:2.0:bindings:HTTP-Redirect" inside the xml.
After you export the metadata, paste it in the Idp Metadata field.
Step 31: Copy the Certificate and paste it in the Signing Key field
Find the <ds:X509Certificate> element in the IDP metadata and copy its value. Paste it between these lines:
-----BEGIN CERTIFICATE-----
[PASTE THE VALUE FROM IDP METADATA]
-----END CERTIFICATE-----
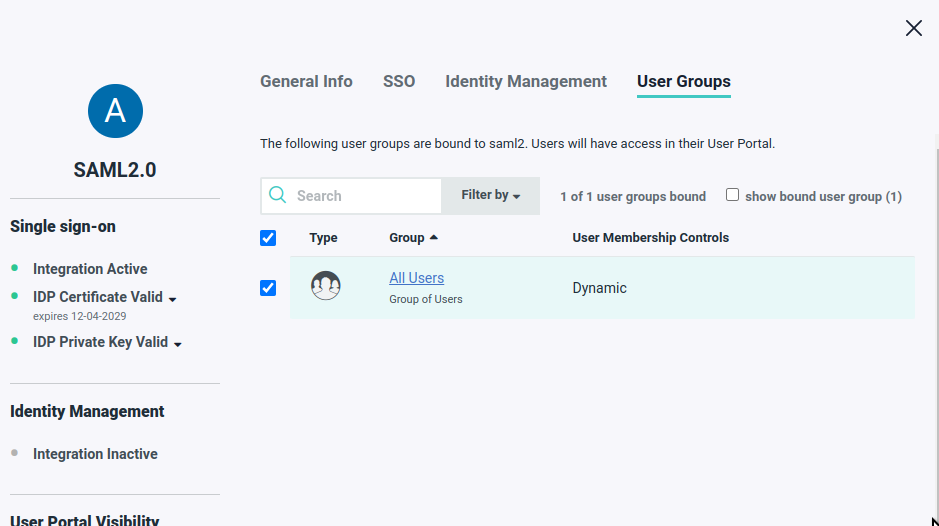
Step 32: Make sure you Assigned the App to the User