Deployment Checklist
This tutorial assumes you have already followed the quick start guide using one of the installation methods listed in Install Overview.
In this section, we will go through the checklist after using one of the installation methods and ensure that your deployment is production-ready.
Decide on Sandboxing
You should decide on the sandboxing mode for your deployment based on your use case and whether it is multi-tenant or not. Here is a simplified way to decide:
Friendly Tip #1: For multi-tenant setups, use V8/Code Sandboxing.
It is secure and does not require privileged Docker access in Kubernetes. Privileged Docker is usually not allowed to prevent root escalation threats.
Friendly Tip #2: For single-tenant setups, use No Sandboxing. It is faster and does not require privileged Docker access.
More Information at Sandboxing & Workers
Enterprise Edition (Optional)
For licensing inquiries regarding the self-hosted enterprise edition, please reach out to sales@staqr.com, as the code and Docker image are not covered by the MIT license.
You can request a trial key from within the app or in the cloud by filling out the form. Alternatively, you can contact sales at https://www.staqr.com/sales.
Please know that when your trial runs out, all enterprise features will be shut down meaning any user other than the platform admin will be deactivated, and your private integrations will be deleted, which could result in flows using them to fail.
Enterprise Edition only works on Fresh Installation as the database migration scripts are different from the community edition.
Enterprise edition must use PostgreSQL as the database backend and Redis as the Queue System.
Installation
- Set the
STAQR_EDITIONenvironment variable toee. - Set the
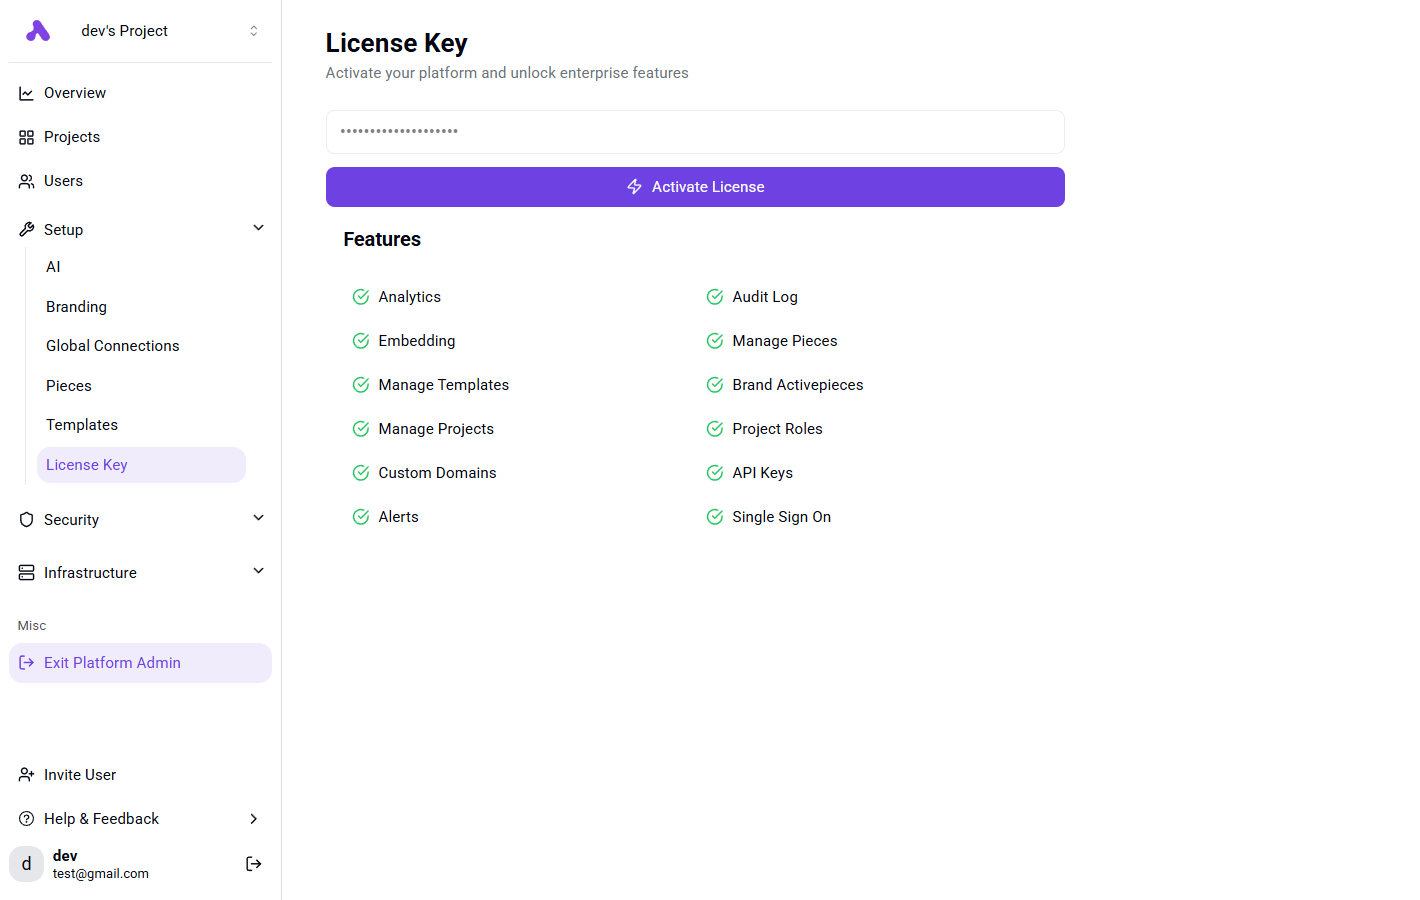
STAQR_EXECUTION_MODEto anything other thanUNSANDBOXED, check the above section. - Once your instance is up, activate the license key by going to Platform Admin -> Setup -> License Keys.
Setup HTTPS
Setting up HTTPS is highly recommended because many services require webhook URLs to be secure (HTTPS). This helps prevent potential errors.
To set up SSL, you can use any reverse proxy. For a step-by-step guide, check out our example using Nginx.
Configure S3 (Optional)
Run logs and files are stored in the database by default, but you can switch to S3 later without any migration; for most cases, the database is enough.
It's recommended to start with the database and switch to S3 if needed. After switching, expired files in the database will be deleted, and everything will be stored in S3. No manual migration is needed.
Configure the following environment variables:
STAQR_S3_ACCESS_KEY_IDSTAQR_S3_SECRET_ACCESS_KEYSTAQR_S3_ENDPOINTSTAQR_S3_BUCKETSTAQR_S3_REGIONSTAQR_MAX_FILE_SIZE_MBSTAQR_FILE_STORAGE_LOCATION(set toS3)STAQR_S3_USE_SIGNED_URLS
Friendly Tip #1: If the S3 bucket supports signed URLs but needs to be accessible over a public network, you can set STAQR_S3_USE_SIGNED_URLS to true to route traffic directly to S3 and reduce heavy traffic on your API server.
Troubleshooting (Optional)
If you encounter any issues, check out our Troubleshooting guide.